The Benefits
How It Works
Transfer Tips
Where To Buy
About Us


Full Front Graphics | Top Center Graphics | Left & Right Chest Graphics | Vertical Side Graphics

How To Align Vertical Side Graphics Instructions

Online Video: Click on the center of the video screen to play.

Written Instructions:

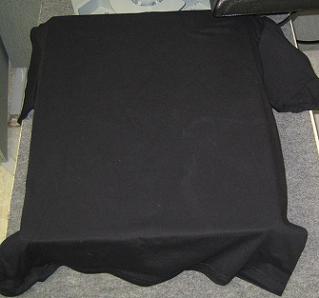
Step #1: Lay the t-shirt on to the heat press platen.

Full Front Back Design Alignment Instructions

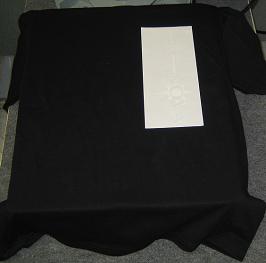
Step #2: Place the heat applied graphic / transfer on top of the t-shirt.

Left Right Vertical Side Design Alignment for Heat Press

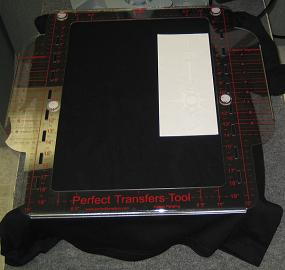
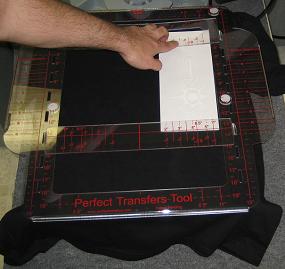
Step #3: Set the Perfect Transfers Tool on top of the t-shirt. Use the Collar Alignment and Sleeve Alignment markings to square the Tool to the t-shirt.

Left Right Vertical Side Design Alignment for Heat Press

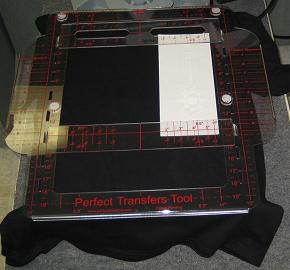
Step #4: Put in the Small and Large inserts into the slots on the Perfect Transfers Tool.

Left Right Vertical Side Design Alignment for Heat Press

Step #6: Use the Vertical and Horizontal Guides to center the heat applied graphic / transfer with the t-shirt.
NOTE: You can use Small and/or Large Inserts to assist in alignment the heat applied graphic / transfer to the t-shirt.

Left Right Vertical Side Design Alignment for Heat Press Left Right Vertical Side Design Alignment for Heat Press

Step #7: Remove the Perfect Transfer Tool and close the heat press use the appropriate amount of time, temperature & pressure.

Full Front Back Design Alignment Instructions

The Perfect Transfers Tool is Patented under Patent #7559151.


Aligning Full Front Back Designs on Heat Press
Aligning Top Center Graphics for Heat Press
Align Left Right Chest Designs for Heat Press
Get the Instructions for Left Right Chest Designs
Vertical Side Graphic Alignment on Heat Press
Align Vertical Side Designs for Heat Press
Aligning Vertical Side Graphics on Heat Press